The perfect setup,
in five steps.
Half the battle when filming is where the camera goes. Here you see, with real examples, how to place your iPhone so the whole court is in frame and the AI cleanly detects every point.
You'll find this guide in the app too, right before you record.
In five steps
How to set up the camera
Step 01
Camera placement
Place the camera centered behind the baseline, a little back from it, aimed straight at the middle of the court.
Start recording from the bench: remote control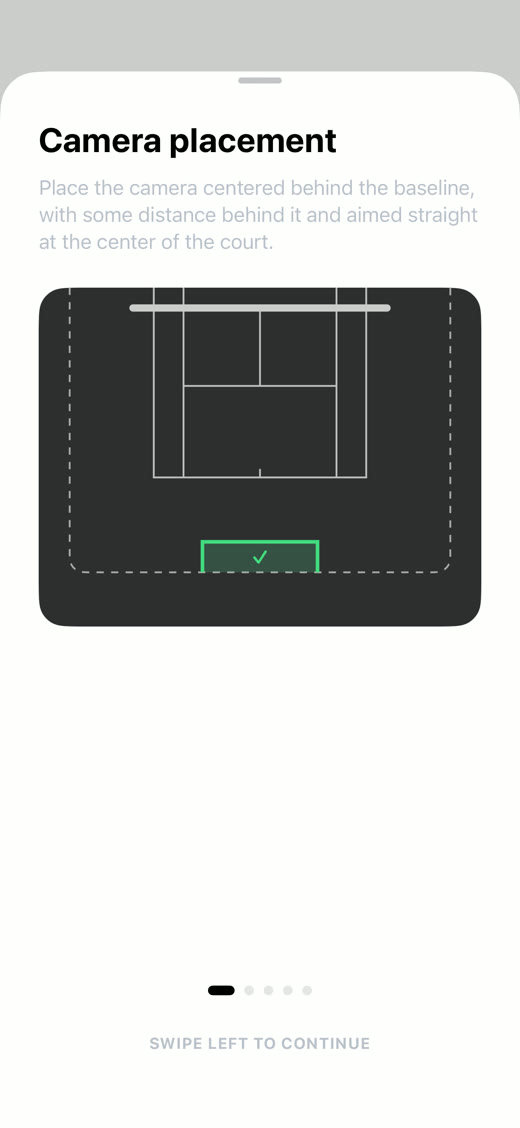
Step 02
Camera height
Set the camera up about 2.5 to 4 m high, slightly above net height and tilted down toward the middle of the court, for example on a stand or in the stands.
These examples show you step by step what the ideal view looks like, from bad to perfect.
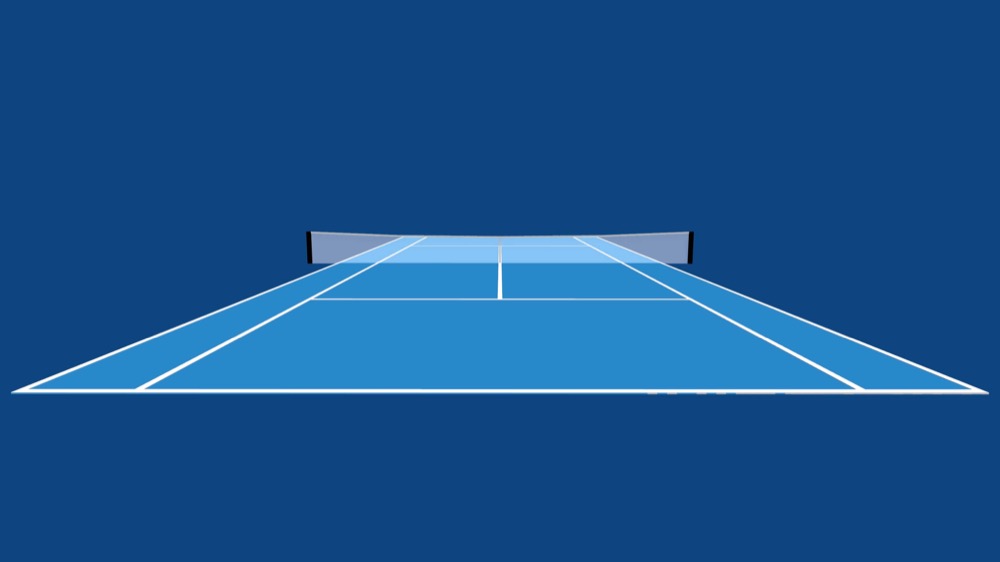
Set up too low: the top edge of the net hides the far baseline, it can't be seen.
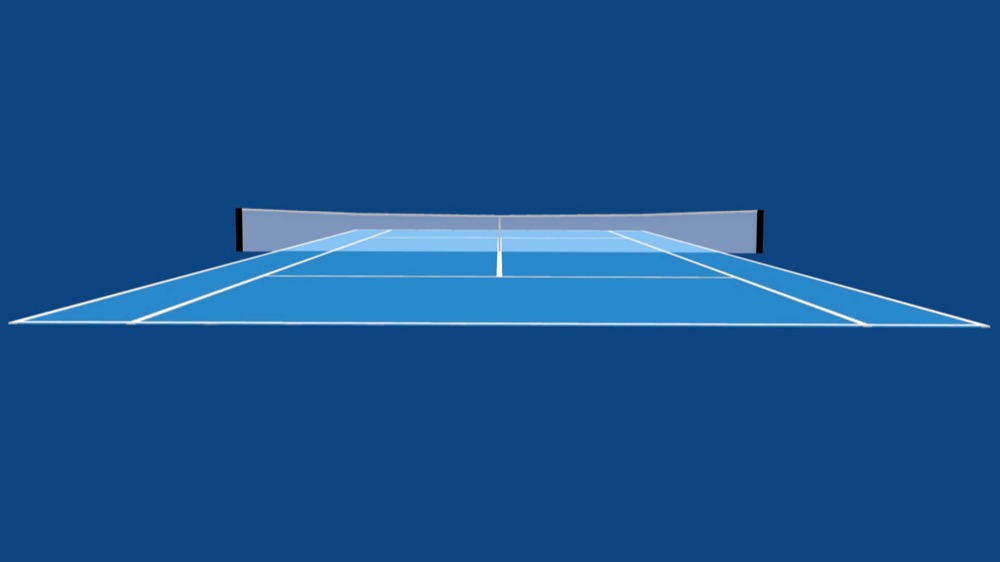
Still a bit too low: the far half of the court is hard to make out.
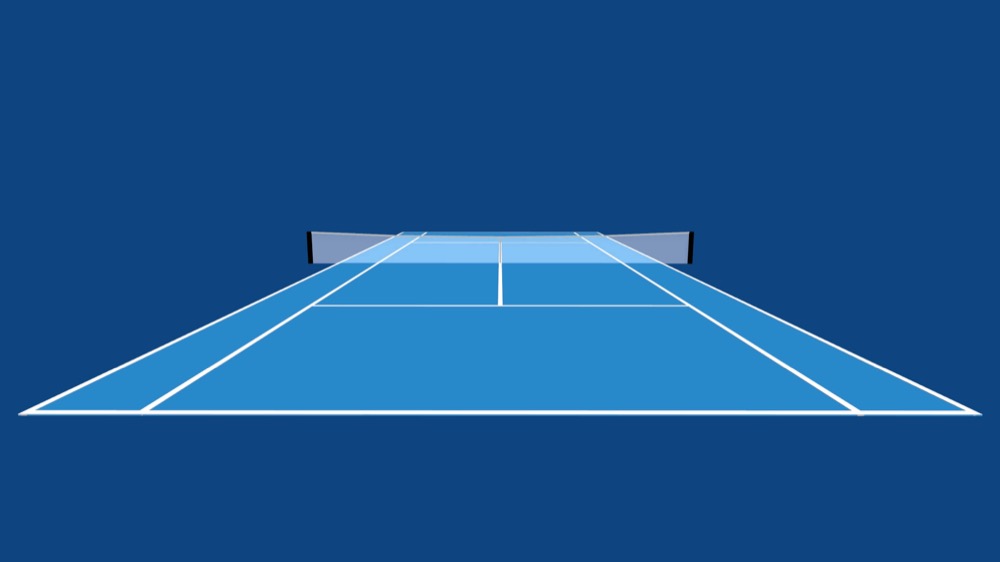
Good height: the far baseline sits above the top edge of the net and is clearly visible. Only the service line on the opposite side is still just below it.
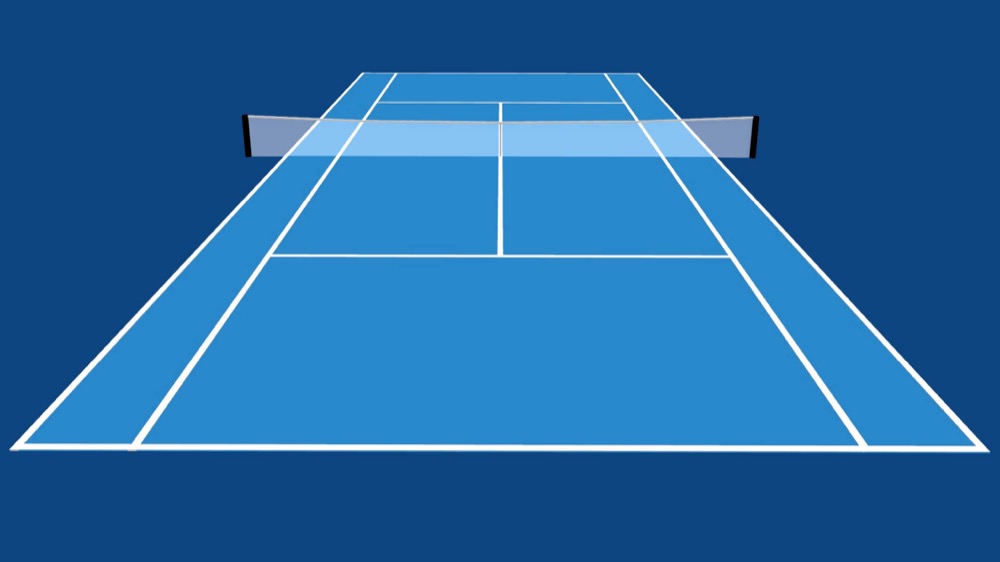
Perfect height: the entire court is clear and free of overlaps.
No tripod that tall?
A regular tripod at about 1.5 m still gives you very good results. The automatic cut into rallies works just as reliably from that height. Only the ball marks get less precise, and the app more often misses where the ball lands, because the near player hides it more from that angle. The easiest way up to 2.5 m is a camera mount that hooks into the fence behind the baseline.
Step 03
Camera zoom
Zoom so the whole court fits in frame with all lines and a little margin, not too close and not too far.
These examples show you step by step what the ideal view looks like, from bad to perfect.
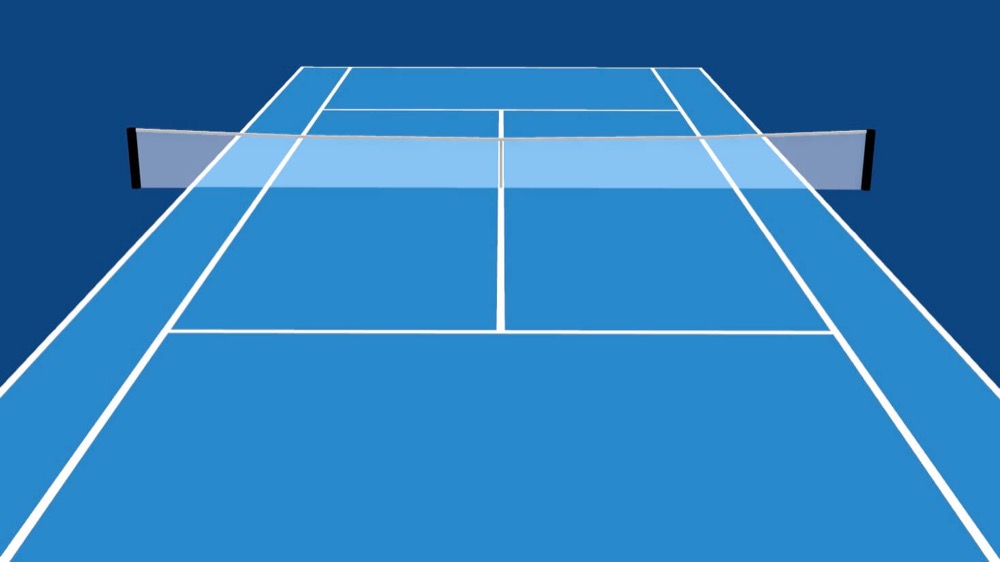
Zoomed in too close: the near baseline and the near corners of the singles and doubles court are cut off.
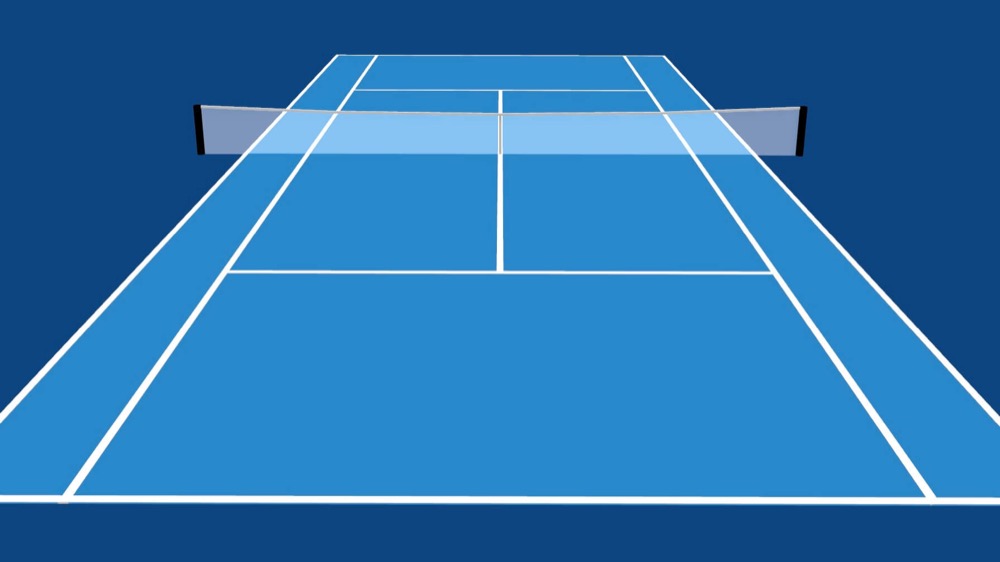
Still too close: the singles lines are fully visible, enough for singles. But the doubles lines are cut off on the near side.
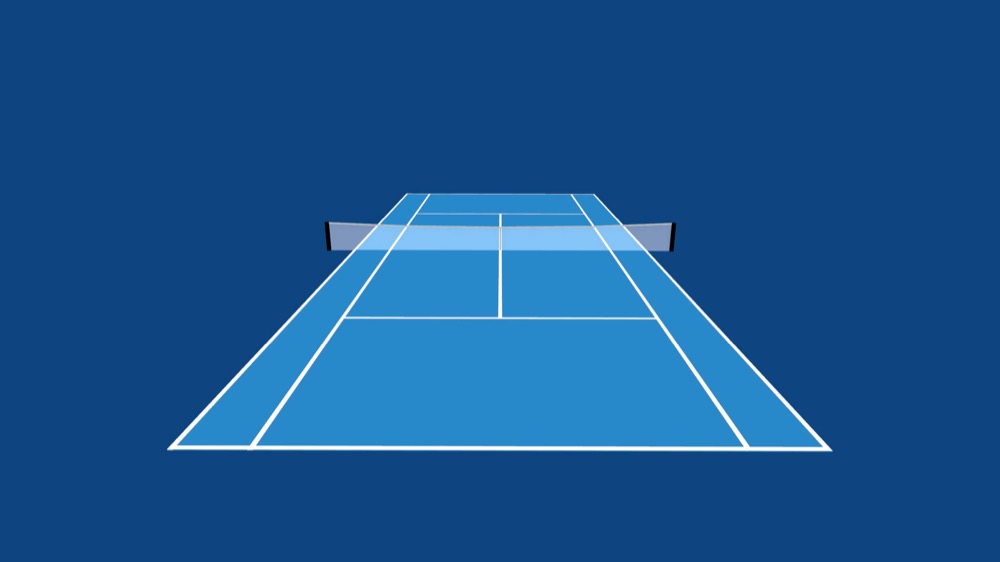
Zoomed out a little too far: too much unused margin is left to the left and right of the court.
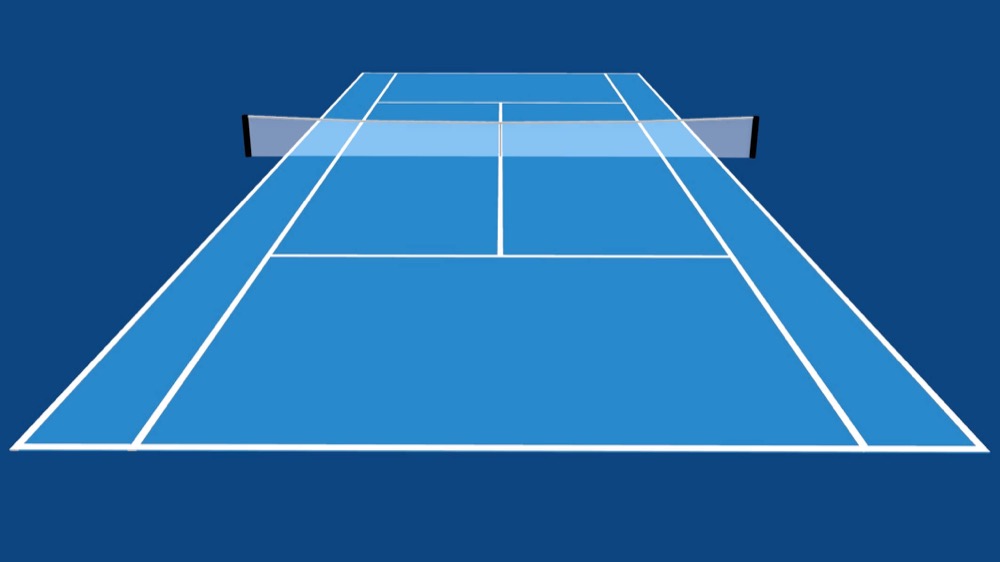
Perfect zoom: the whole court fills the frame with a little margin, all lines are visible.
Step 04
General tips
A few small things make the difference for a clean recording. Keep these in mind when you set up.
Light behind you
Don't film into the sun.
Set it up steady
Fix the camera firmly, ideally on a tripod.
Keep it still
Don't shake during the recording.
60 fps
Film at 60 frames per second.
High resolution
At least 1280 × 720, higher is better.
Do not disturb
Turn on Do Not Disturb before recording so no notification interrupts it.
Step 05
Add a video
Import a recorded match or record a new one at 60 fps right away, so Raqet AI can analyze it.
Everything about importing a video
Questions & answers
Frequently asked questions
Yes. The automatic cut into rallies works just as reliably from that height. Only the ball marks get less precise, because the near player hides the ball more often. For full accuracy, hang the iPhone on the fence at 2.5 m with a fence mount.
Easiest with a camera mount that hooks into the fence behind the baseline. Alternatively the stands, a terrace or a tall tripod behind the fence.
Yes, the setup is the same. When zooming, make sure the doubles lines are fully in frame on both sides, and pick Doubles in the app.
No. Detection is built for the view from behind the baseline, because only then are both players and all lines in frame at the same time.
Yes. In portrait the court does not fit in frame. You can still export your rallies in 9:16 for Reels and TikTok afterwards.
Keep reading
Related topics
Camera's ready, now record.
Download Raqet AI for free and analyze your first match today.